Building a cob garden shed in just over 100 days
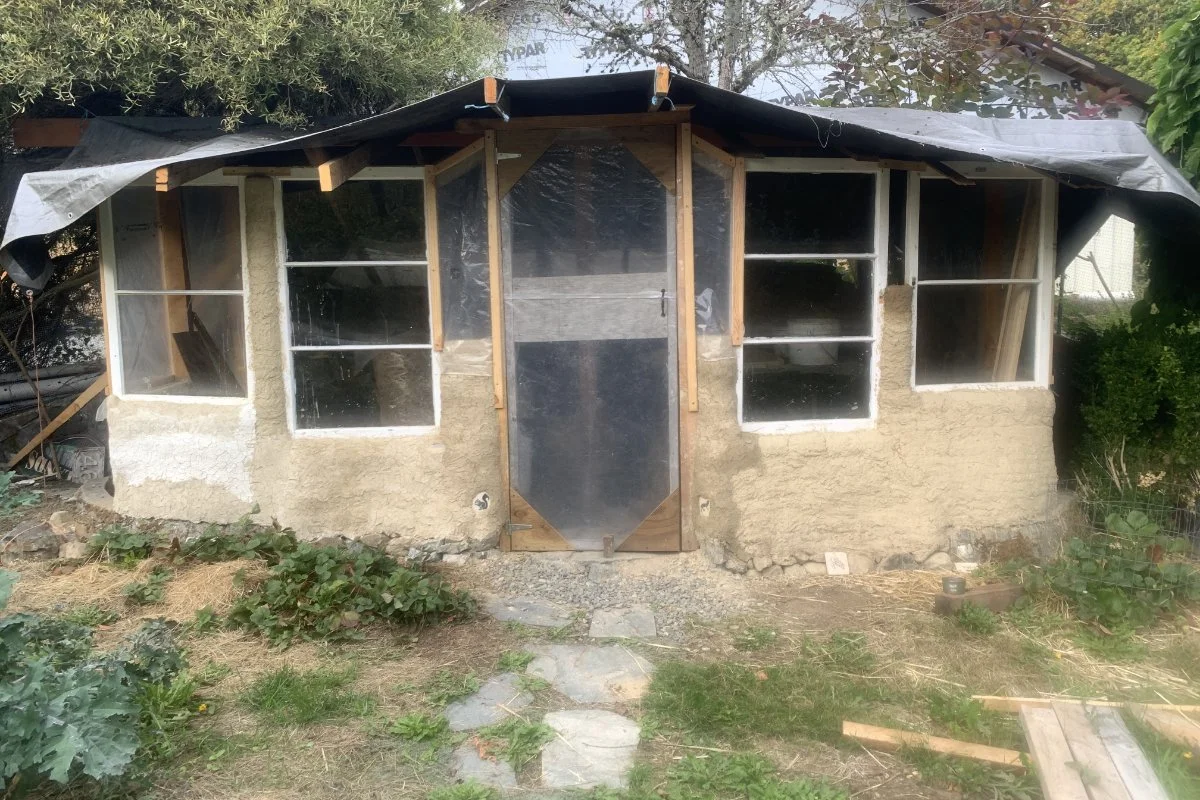
Using materials largely found and repurposed on-site, Irene created this cob garden shed, with help from her nephew, a carpenter.
Last summer, Sooke Garden Club member Irene attended a three-day cob building workshop on Lasqueti Island to learn the “Fast Cob” technique, then bring back that knowledge home to Sooke. Here, Irene walks us through the following three months as she created a cob garden building.
In the Round Garden on Kluane’s property, I was looking at a low rock wall structure that wasn’t suitable for growing plants, and I got an idea: to build a garden shed to store garden tools and supplies.
I could make a basic wood structure and infill it with cob – a mixture of sand, clay, water and straw – with material from the land, building the cob onto the surrounding rock wall, while utilizing what I had access to, including a pile of recycled wood left from previous lumber milled on the property.
This follows several Permaculture principles:
Turn problems into solutions – how the elements of the problem can be utilized.
See the value in all things.
Use non-biological resources carefully and only when necessary to create long-term, sustainable systems.
Observe the site and all its elements
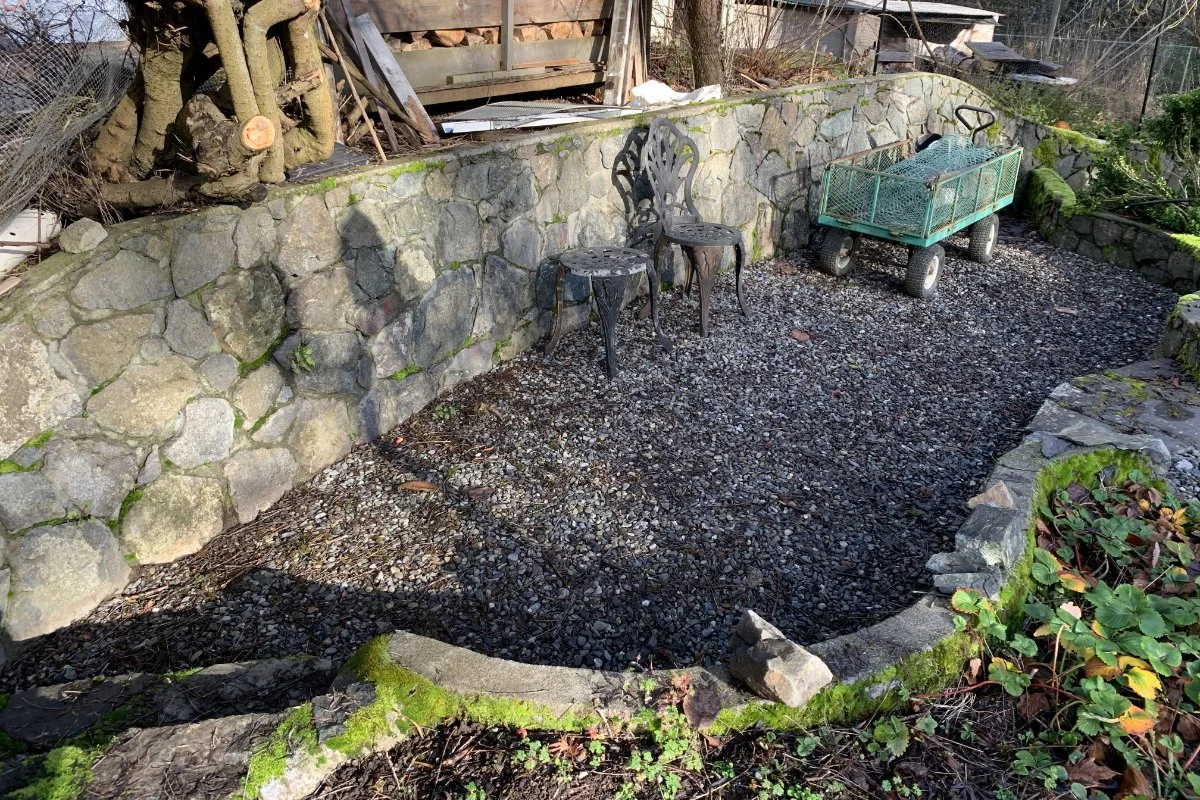
A low rock wall provided the foundation for the cob garden shed.
July 23 to 25 I started the project with a soil test, digging into the subsoil at the back of the property where I found a clay mix without humus that I could use to form the cob material, without buying and trucking soil to the site. I then cut mixing tarps from old tarp, gathered rocks and built a base layer of new wall at back of shed, bought a bale of straw at Buckerfields for $30 and made two test bricks of cob material to see strength.
July 26 to Aug. 2 Dug subsoil from back of property and made cob batches and layered them to top of rock wall to desired height of 22” (56cm).
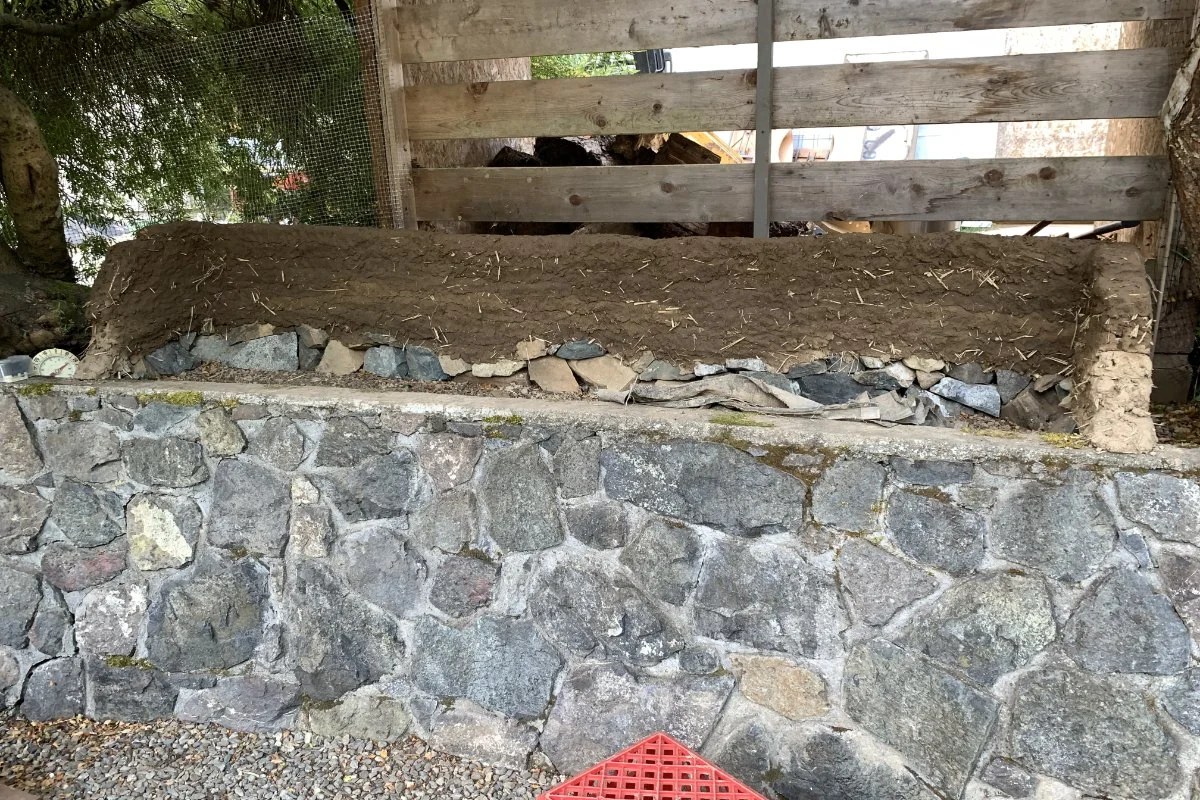
Rocks placed above the exiting wall create the base for the new back wall.
Aug. 3 to 7 Next, I covered the low cob wall with tarps to protect from rain, then designed the front wall and end walls using recycled wood and recycled windows, plus one 16-foot (3.3-metre) beam for the top of the gable roof. To support the building structure, I sourced board pieces from a pile of cast-offs from a lumber milling project in the back of the property.
Aug. 9 to 11 I cut boards to create end-wall doorways as the structure to hold up the centre roof beam, and removed nails from recycled 2x4s for rafters.
Aug. 12 I worked with my nephew, a carpenter, to build the wood structure.
Aug. 14 to 16 Using a sledge hammer, I removed some of the rock wall in the front middle section for a south-facing front door. I adjusted the plans to scale to include the door height and recycled window sizes for the front wall, then my nephew and I developed the angles needed between the walls, window frames and rafters.
Aug. 17 I sourced more boards from the milling site.
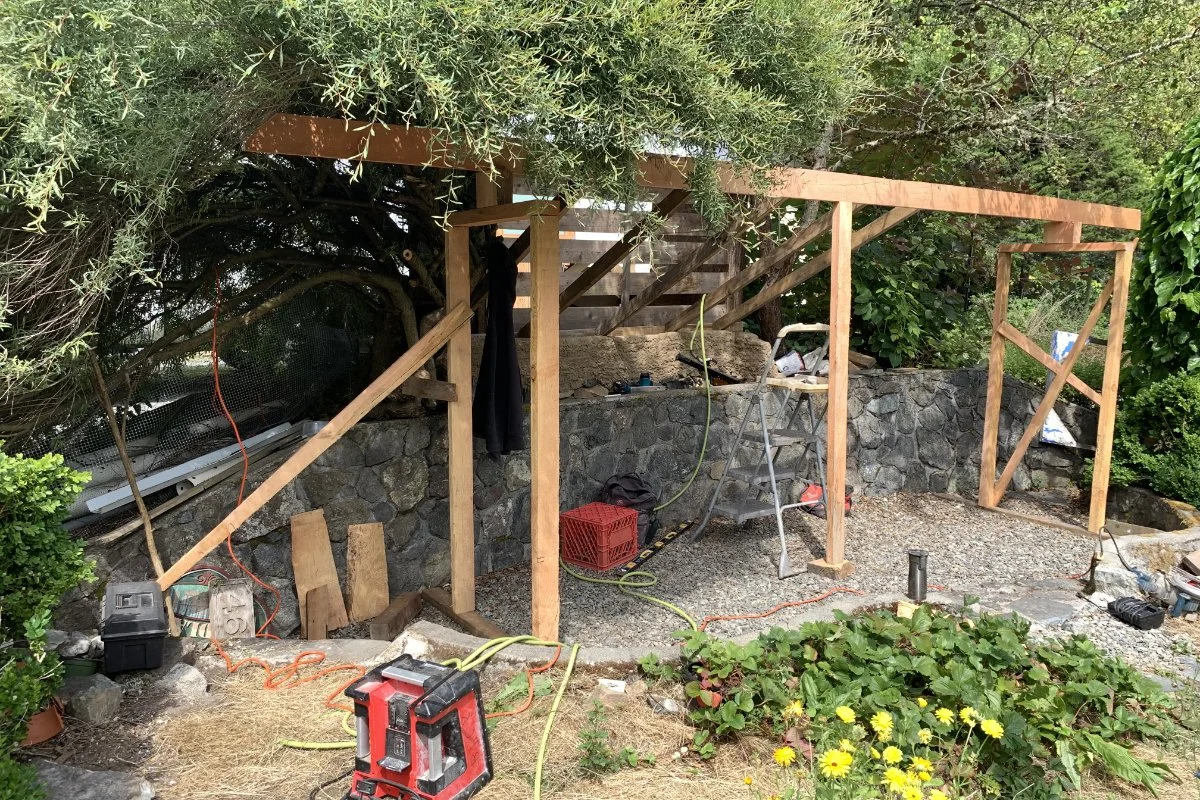
Using reclaimed wood from the property, Irene and her carpenter nephew created the wood frame for the building.
Aug. 19 We worked for five hours building the basic structure for the cob building, including both end-wall door openings, braced upright in place and attached to the 16-foot roof beam.
Aug. 20 I spent four hours creating the first cob layers onto the west front wall that would support the windows, hauling buckets of sub-soil from the back of property in a wagon.
Aug. 21 to 23 I worked close to 19 hours over three days on the cob structure.
Aug. 26 I started on the east side, hauling and placing rocks at the base of both sides, hauling sub-soil, mixing and applying cob to the rock base.
Aug. 27 With the west wall dry enough, we placed the windows and anchored them into the site. Then I started applying cob around the window frame to secure it into the wall. Woke to rain at 3 a.m. and rushed outside to cover the new cob areas.
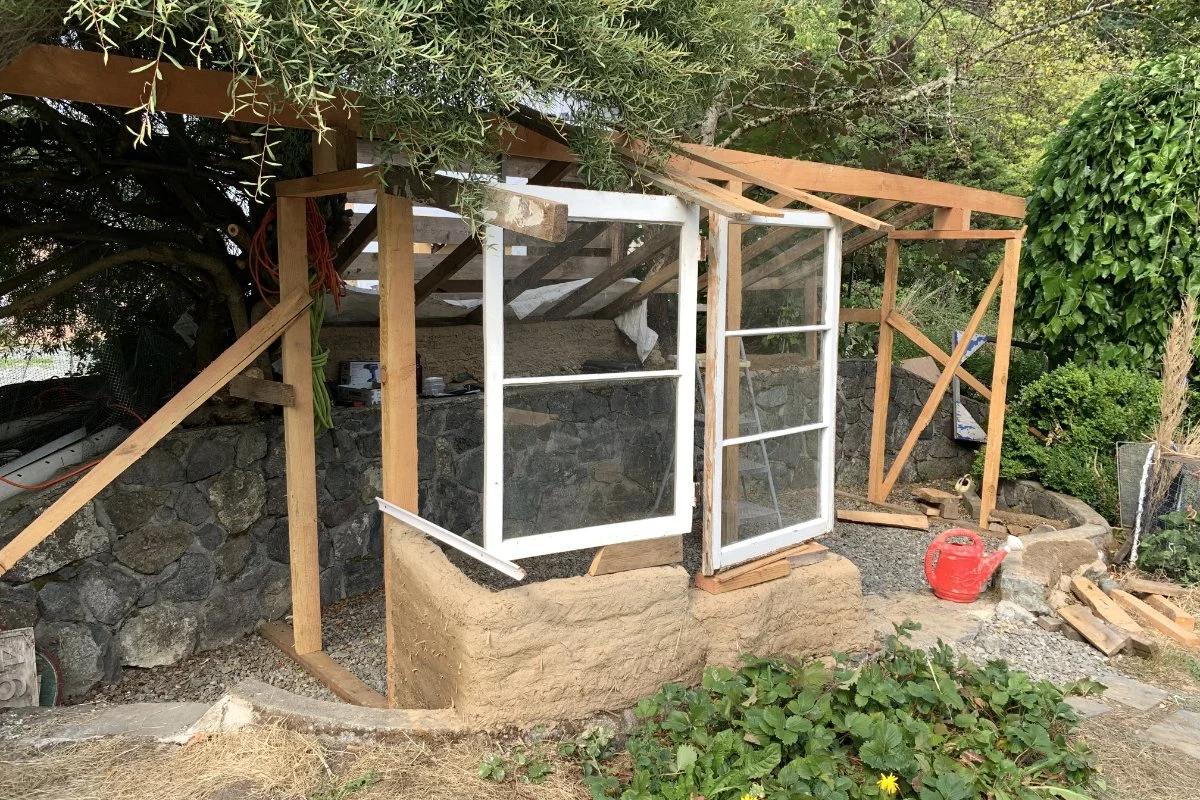
Windows held in place.
Aug. 28 We built the front door frame and anchored it with rafters, then I built cob layers around windows on both sides of the front door. We finished by dragging an old tarp over the whole structure as a roof and anchored it into place.
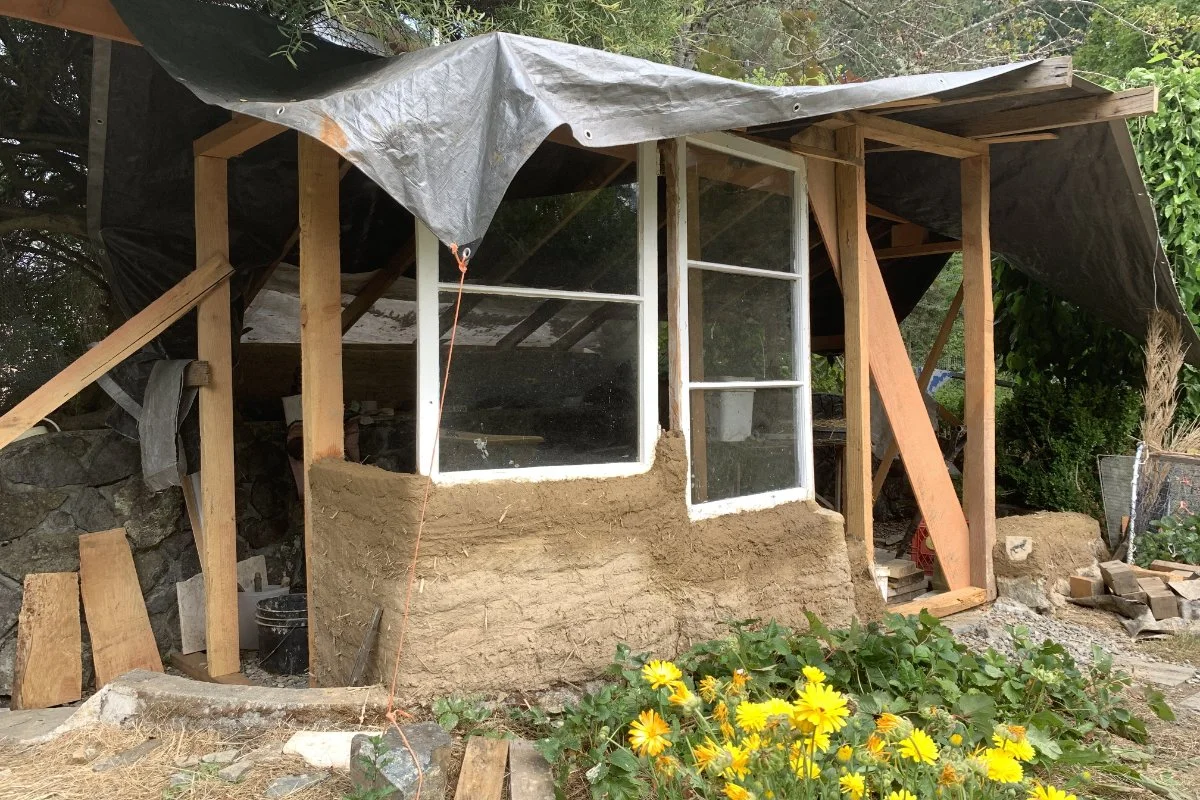
Cob build around windows to secure them.
Aug. 29 to Sept. 1 Mixed and applied cob to all areas.
Sept. 2 to 9 Continued a daily round of cobbing to build up the lower walls, letting it dry overnight.
Sept. 10 We installed the first window on the east side of the front door, anchoring it to the rafters.
Sept. 11 to 13 Continued cobbing around on all points of the building.
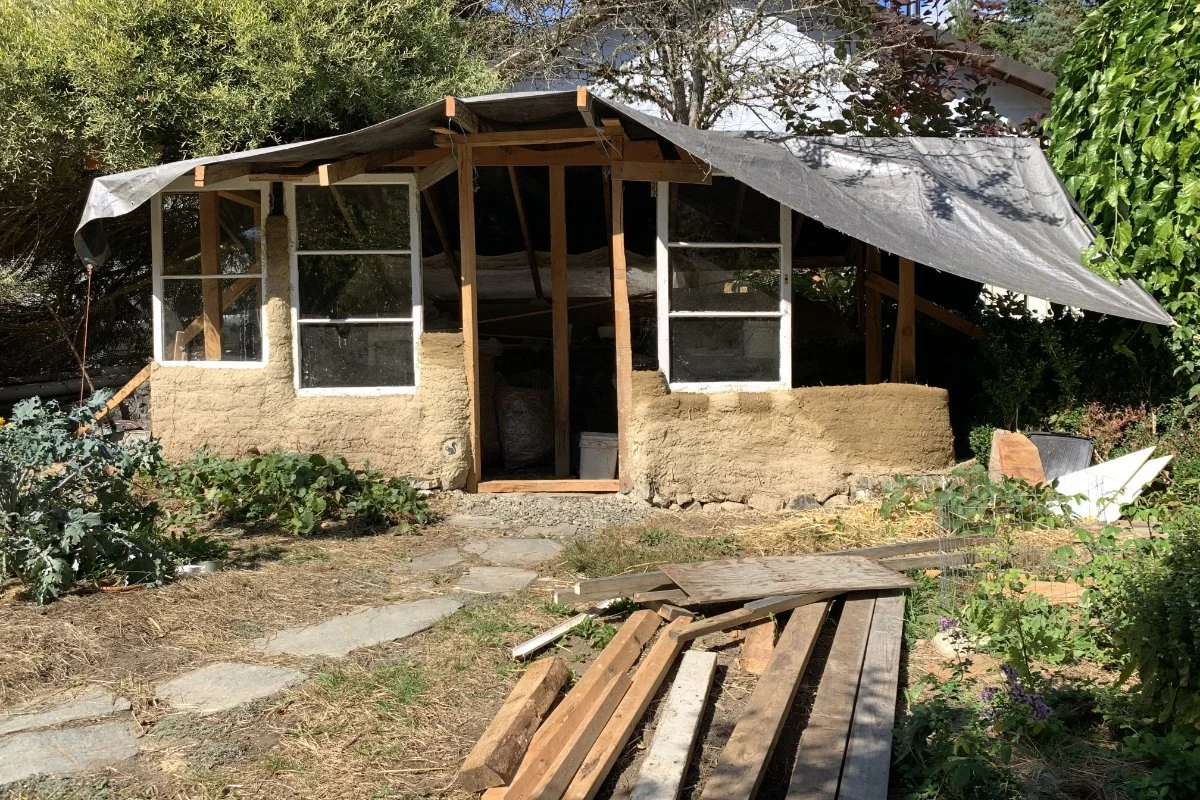
Cobbing around window and door frames, with tarp secured to keep rain away.
Sept. 14 to 18 Continued cobbing rounds, prepared plastic and wood for the west corner window, worked on the front door frame and installed window plastic beside the front door.
Sept. 19 We installed the fourth window, securing it to the rafters and to the back door frame and other window, then cobbed around them.
Sept. 20 Finished some cobbing, then taped some holes in the roof tarp before forecasted rain.
Sept. 22 to 25 More cobbing, then mixed and tested exterior plaster, which includes cow manure to help to protect the cob from erosion from the winter rains.
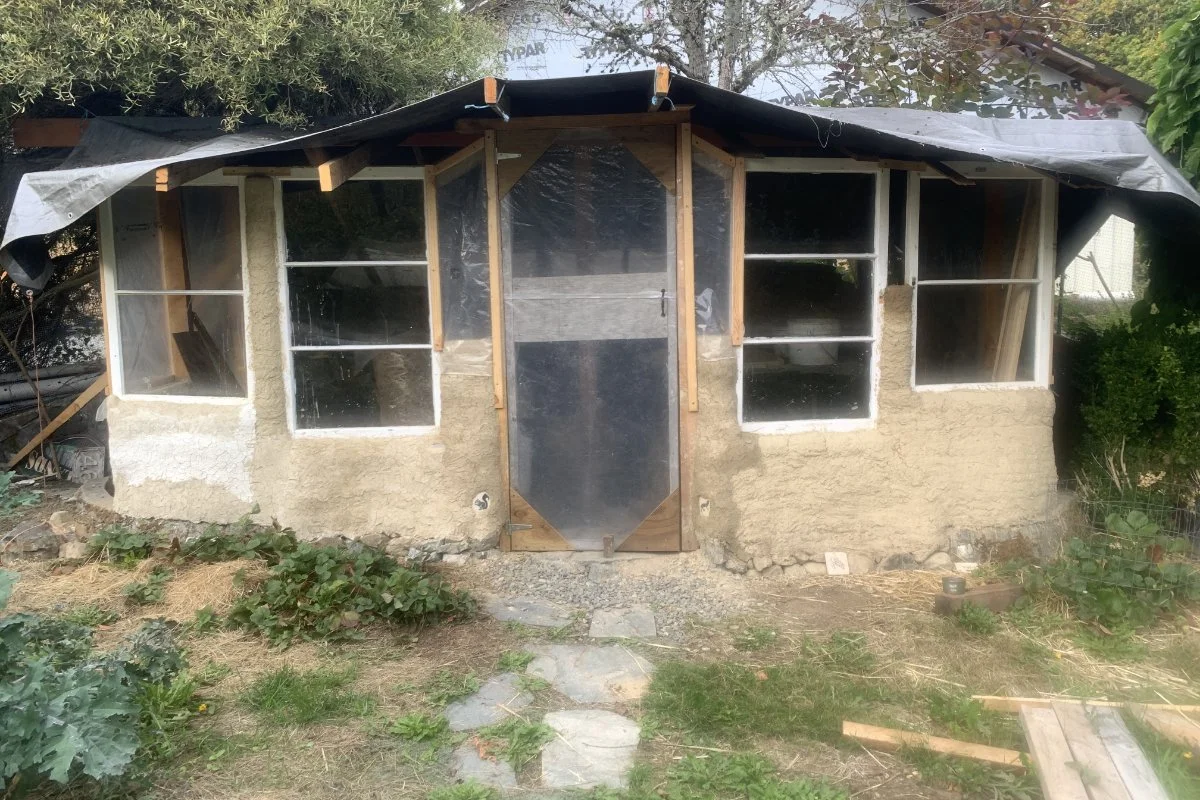
Repurposed windows and front door installed.
Sept. 26 Put plastic on three windows and cobbed back wall.
Sept. 28 Installed front door frame hinges, then covered it with plastic.
Sept. 30 Cobbed tops of back and side walls, hung plastic sheets over other two door ways to block wind.
Oct. 1 & 2 A little more cobbing on back and end walls and finished edges of the front door.
Oct. 8 & 9 More cobbing and plastering outside wall.
Oct. 14 We installed three more rafters on the front east corner and secured the tarp with thin wooden outside pieces.
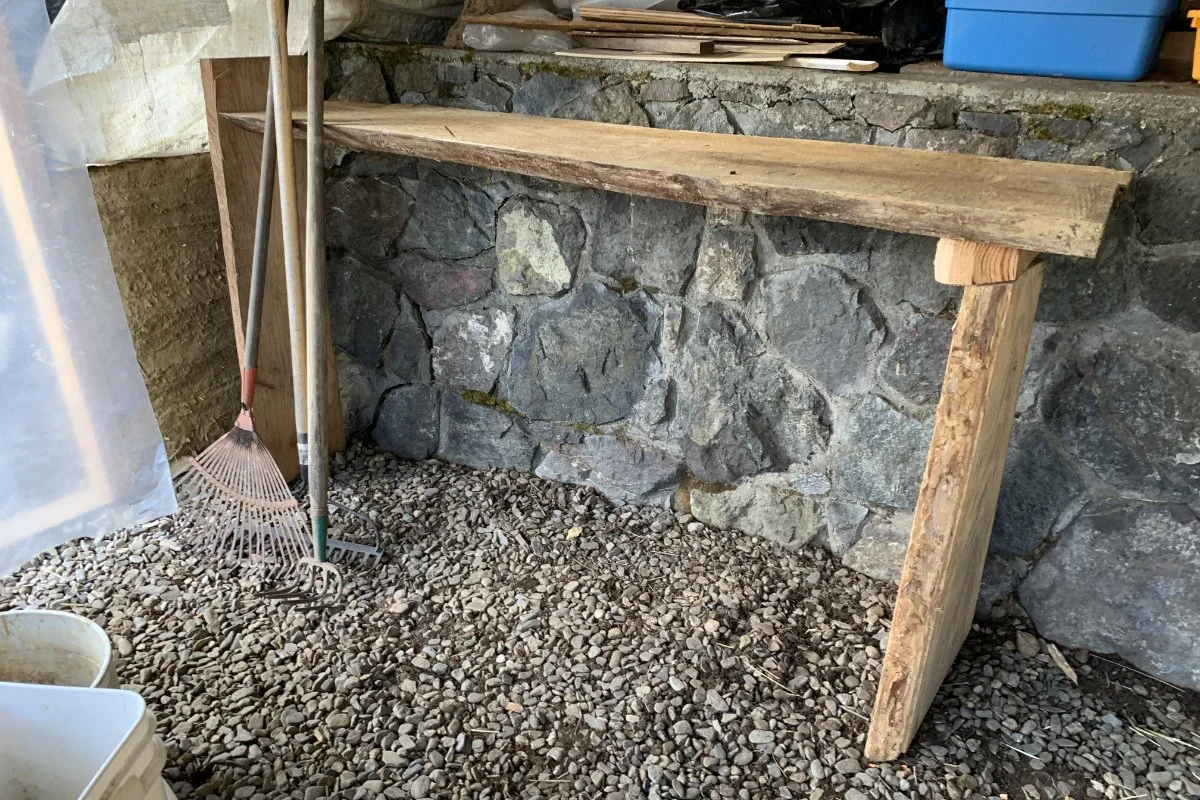
Additional leftover milling serves as work benches.
Oct. 16 I secured end door covers with wood strips on one side and top, and did final cobbing on the inside back wall. Secured white plastic around and under tree root inside to shed rain outside. Moved all tools inside and used additional leftover milling to create work benches.
Oct. 17 to 30 Daily added a little more cobbing on the back corner wall.
Done! After 100 days building with cob and wood and a large tarp.